When filament is purchased by the spool for a one-off print, incoming inspection is rarely a concern: the problem becomes visible on the first print. But as soon as regular batches, print farms, or serial production of parts are involved, the situation changes. It is cheaper to detect a defective or moisture-affected batch in the warehouse than after dozens of print hours and ruined parts.
Incoming inspection does not have to be a complex laboratory procedure for every spool. Its purpose is not to check every meter of filament strand, but to make a balanced decision based on several indicators from an acceptable sample: accept the batch, send it for drying, or return it to the supplier. Below is a simple method that a technical team can implement without a laboratory and adapt for PLA, PETG, ABS+, ASA, TPU, PA/Nylon, and other materials.
First, Define the Acceptance Criteria
A common mistake is to receive a batch, take a few random measurements, and only then decide what should count as a defect. Criteria are set before the order is placed. The specification or contract should define the material type and grade, nominal diameter and allowable deviations, color or agreed reference sample, net weight, spool format, winding requirements, packaging type, marking and batch traceability, list of accompanying documents, storage conditions, test-print method, and rules for handling nonconformities.
There is no universal tolerance suitable for all materials, printers, and processes. The criteria must match the buyer’s equipment and the requirements for the final parts. Results should be compared with the agreed specification, not with an abstract “market norm.”
Prepare a Simple Inspection Kit
For a basic check, you need scales with appropriate readability, a micrometer or another tool for measuring diameter, a reference spool or approved color sample, a test 3D printer in a controlled condition, a standard test model, a protocol form, and labeled bags for control samples. A caliper is suitable for a preliminary check, but for regular diameter control a micrometer with controlled measuring force is preferred, especially for TPU and other flexible materials that are easily deformed during measurement.
Step 1. Isolate the Batch and Check the Documents
After receipt, the filament is not sent directly to production areas. The batch is placed in a temporary storage area with the status “Under inspection” to avoid mixing unchecked material with remnants of previous batches. Record the supplier, receipt date, order number, material and color, declared quantity, batch number, box numbers, and freight condition at acceptance.
Next, compare the data on the box, spool, and accompanying documents: material name, diameter, color, weight, and batch number. Good marking includes the lot, production date, and net weight. This is the basis of traceability. If the material is supplied with a TDS, batch inspection certificate, or SDS, make sure the batch number on the spool matches the document. The existence of a document does not by itself confirm conformity. It is important that the document refers to the exact material received. If the batch cannot be identified unambiguously, it should not be released to production until the supplier clarifies it.
Step 2. Visual Inspection and Packaging
A quick inspection without instruments is performed on all transport units. Look for torn bags and loss of sealing, damaged boxes, deformed spools, traces of moisture or contamination, missing desiccant if required, loose or crossed windings, filament jammed between turns, cracks and foreign inclusions on the surface, and color differences between spools.
For hygroscopic materials such as PA/Nylon, TPU, PVA, and some PETG grades, packaging condition matters more than it does for less sensitive materials. At the same time, vacuum packaging protects the material during transport, but it is not proof of low moisture content by itself: the filament may have been packaged after it had already absorbed moisture. If there is doubt, the spool should be quarantined until test printing or drying under an agreed regime.
Step 3. Build a Representative Sample and Check Weight
The sample size depends on the batch size, supplier stability, and criticality of the parts. Do not take all samples from one box or the top layer of a pallet. Include spools from different boxes and pallet locations, from the beginning and end of the batch numbering, with suspicious packaging, and with visible differences in color or winding. For the first delivery, a new material, a new color, or a changed formulation, use intensified inspection. After a stable history has been accumulated, review the sample size based on risk.
Weigh the selected spools. To determine net weight, you need to know the weight of the empty spool and account for the bag, desiccant, and labels. Subtracting an approximate tare weight is undesirable because spool batches can differ. Compare the result with the agreed nominal value and allowable deviation.
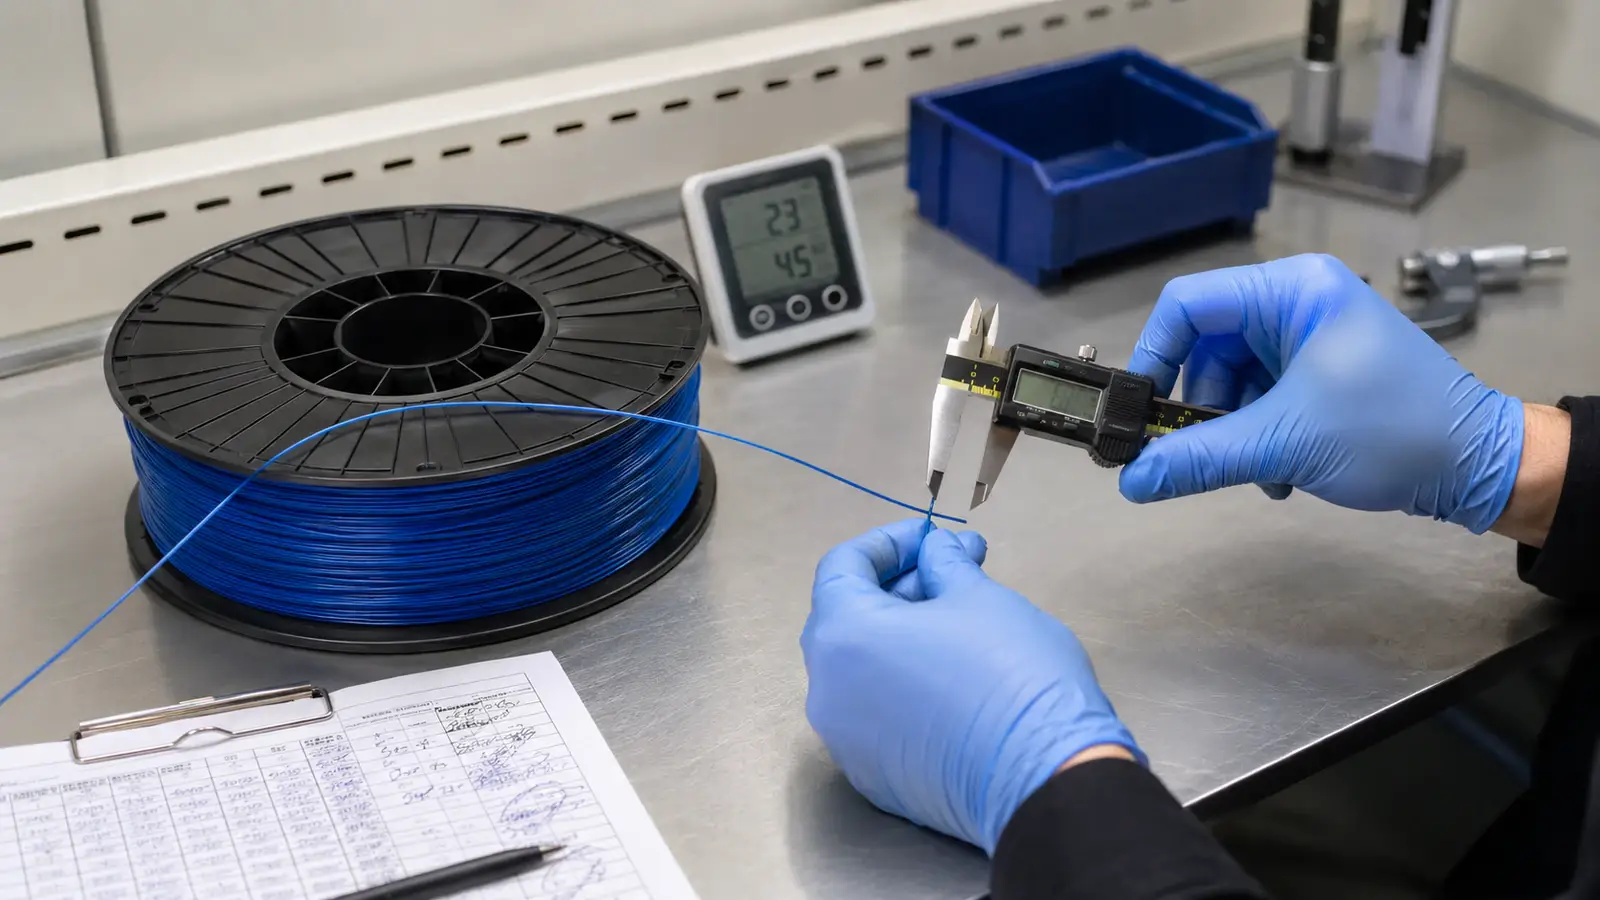
Step 4. Diameter and Ovality
This is the key technical check. Unstable diameter directly affects extrusion volume because the printer calculates feed based on the declared diameter, while cross-sectional area depends on the square of the diameter. Even a small change can noticeably affect flow. Oversized filament causes over-extrusion and clogging; undersized filament causes underfilling and weak layer adhesion.
Inspection sequence:
- Unwind a section from the spool that is long enough for measurements at several separated points, for example every 10-20 cm over a section several meters long.
- At each point, measure the diameter in at least two mutually perpendicular directions. The difference between them characterizes ovality.
- Do not compress the filament strand with excessive force, especially TPU.
- Record the minimum, maximum, and average values, as well as the difference between axes.
A perfectly round filament strand gives the same values on both axes. A noticeable difference indicates an oval cross-section that can jam in the feed mechanism. One measurement at the beginning of a spool does not characterize the batch, and manual inspection does not reproduce continuous laser measurement on the line. Its role is to detect systematic deviations, obvious ovality, and local problems. Compare the obtained values with the tolerance in the supplier’s documents.
Step 5. Assess Moisture Risk
Most filaments are hygroscopic. Polyamides, TPU, and water-soluble materials absorb moisture most actively, but PLA, PETG, ABS, and ASA also require proper storage. During printing, moisture in the filament turns into steam in the nozzle, causing bubbles, popping, stringing, a rough surface, and poorer interlayer adhesion due to hydrolysis.
Directly measuring moisture without laboratory equipment is difficult, so check indirect signs and conditions: packaging integrity, desiccant condition, ambient humidity by hygrometer, and material behavior during test printing. First print the test sample in the “as received” condition. If the entire sample is dried immediately, a preparation or packaging problem in the batch can be hidden. If needed, dry a separate sample according to the manufacturer’s recommendations and repeat the test. Do not dry everything “just in case” at a random temperature: excessive temperature can deform the spool, bond windings together, and impair feeding.
Step 6. Standardized Test Print
A test print brings the previous checks together and must be comparable between batches: the same printer, nozzle, profile version, test model, fixed temperatures and speeds, and controlled drying conditions. Choose a simple but informative sample with thin walls, bridges, corners, and several perimeters. On the first test, do not adjust temperature, flow, or retraction to “make the material work.” Otherwise, inspection turns into development of a new profile and does not show whether the batch is compatible with the already approved process.
During printing, assess feeding stability, extrusion skips, surface quality, corner formation, stringing, warping, interlayer adhesion, and dimensional repeatability. It is advisable to print the same model from an approved reference spool at the same time. A direct “new versus reference” comparison is much more reliable than visual judgement alone and helps distinguish a filament problem from a printer fault, contaminated nozzle, or changed room conditions.
What to Record in the Protocol
| Stage | What to record |
|---|---|
| Identification | Supplier, material, color, batch number, quantity |
| Packaging | Sealing, condition of boxes, spools, and labels |
| Weight | Actual weight, tare accounting method |
| Geometry | Measurement points, minimum, maximum, average, ovality |
| Moisture | Packaging condition, inspection method, signs during extrusion |
| Printing | Printer, nozzle, profile, parameters, and results |
| Decision | Accepted, conditionally accepted, isolated, or rejected |
Add photographs of packaging and defects, the profile file, and marking of the inspected spools to the protocol.
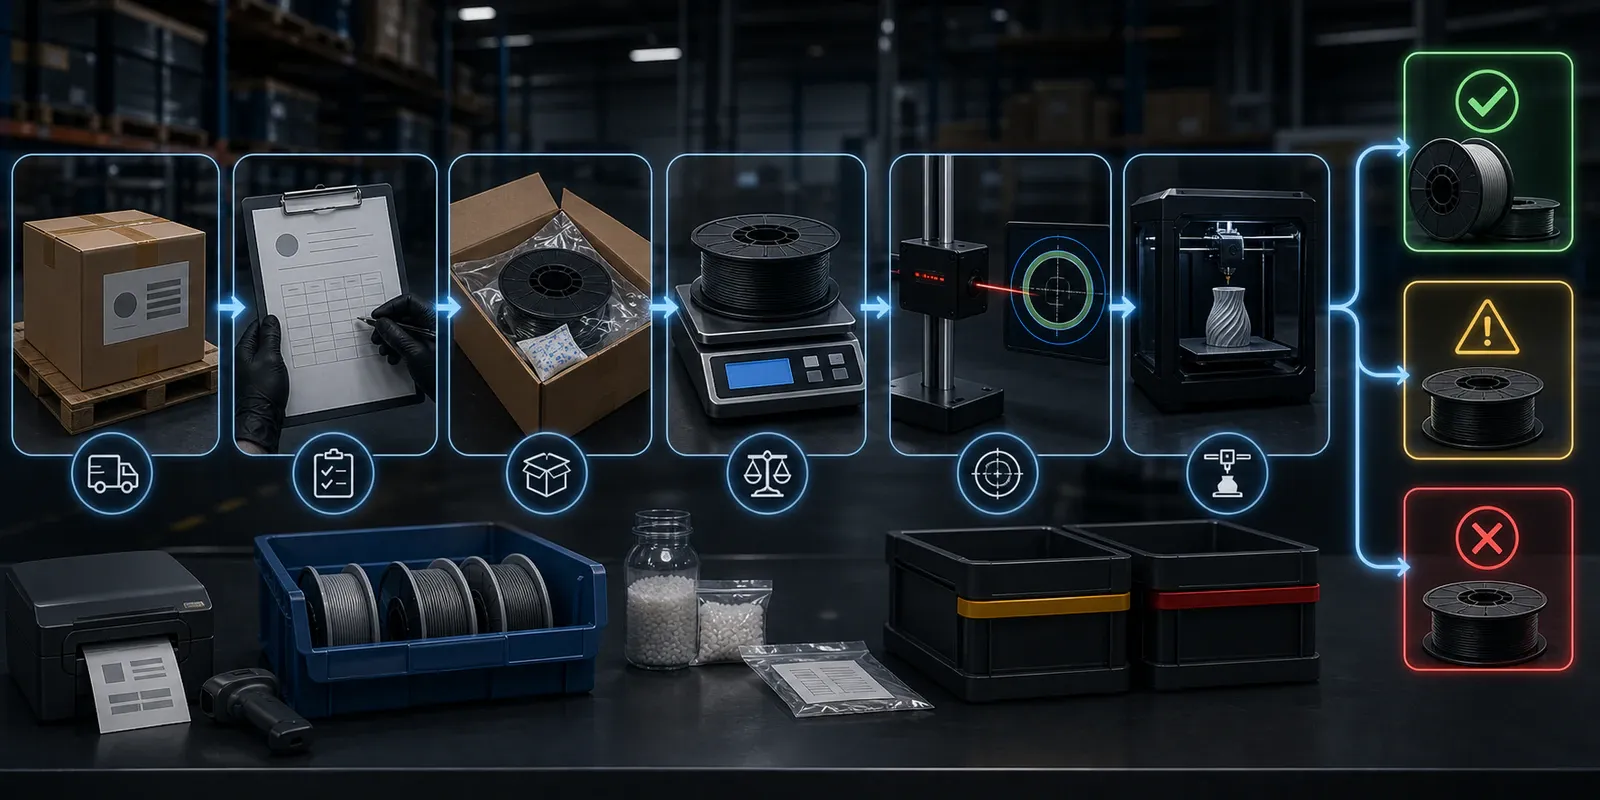
Decision Based on Inspection Results
Based on the results, the batch receives one of the following statuses: accepted - all controlled parameters meet the requirements; conditionally accepted - the material may be used only after an agreed operation, such as mandatory drying, or with limitations; isolated (quarantine) - repeat testing or a supplier response is required; rejected - the nonconformity does not allow the batch to be used. If a deviation is found, keep a packaged control sample, the batch number, measurement results, and photographs. Without traceability, discussion of a complaint is reduced to a subjective description of the problem.
The reliability of inspection is most often reduced by measuring only one section of one spool, comparing against an unagreed “market tolerance,” testing different batches on different printers, changing the profile during the acceptance test, drying the sample before the initial check, judging only by the appearance of the part, and not keeping a control sample or protocol. The strength of the method is not in a single check, but in performing it the same way every time: a short checklist, defined sample size and measurement points, assigned responsible person, and fixed storage location for records.
The best incoming inspection starts even before batch production. For serial deliveries, contract manufacturing, or private label projects, it is advisable to agree on the protocol before the first run. Bokotech agrees with the B2B customer on material, color, diameter, TPU Shore hardness, spool format, marking, packaging, control parameters, and technical communication procedure before production starts. Then incoming inspection becomes confirmation of the agreements rather than a search for surprises, and work with subsequent batches becomes noticeably simpler.